Most small business owners who try Zapier quit within the first hour, not because it’s too hard, but because they start wrong. They search for their app, see 47 possible triggers, and freeze.
Here’s what people who are saving 10+ hours a week actually know: they didn’t start with the cleverest automation. They started with the most obvious one. One problem. One fix. Fifteen minutes.
That’s the only approach that works for beginners, and it’s exactly what this guide covers. Five automations, chosen specifically because they solve problems every small business faces daily. No technical knowledge required. Under 15 minutes each to build. Pick one and start today, the rest will follow naturally.
Understanding Zapier Basics (The 2-Minute Version)
Before we build anything, here’s what you need to know:
A “Zap” is an automated workflow. It connects two or more apps to move information automatically, no manual effort required.
Every Zap has a Trigger and one or more Actions. The trigger is the “when this happens” and the action is the “do this.”
Example: When someone fills out my contact form (trigger), send me an email notification (action).
You build Zaps by clicking through menus, not writing code. Zapier simply asks questions: “Which app triggers this?” “What happens when it triggers?” “What should we do with the information?” You answer by selecting options. That’s genuinely all you need to know to get started.
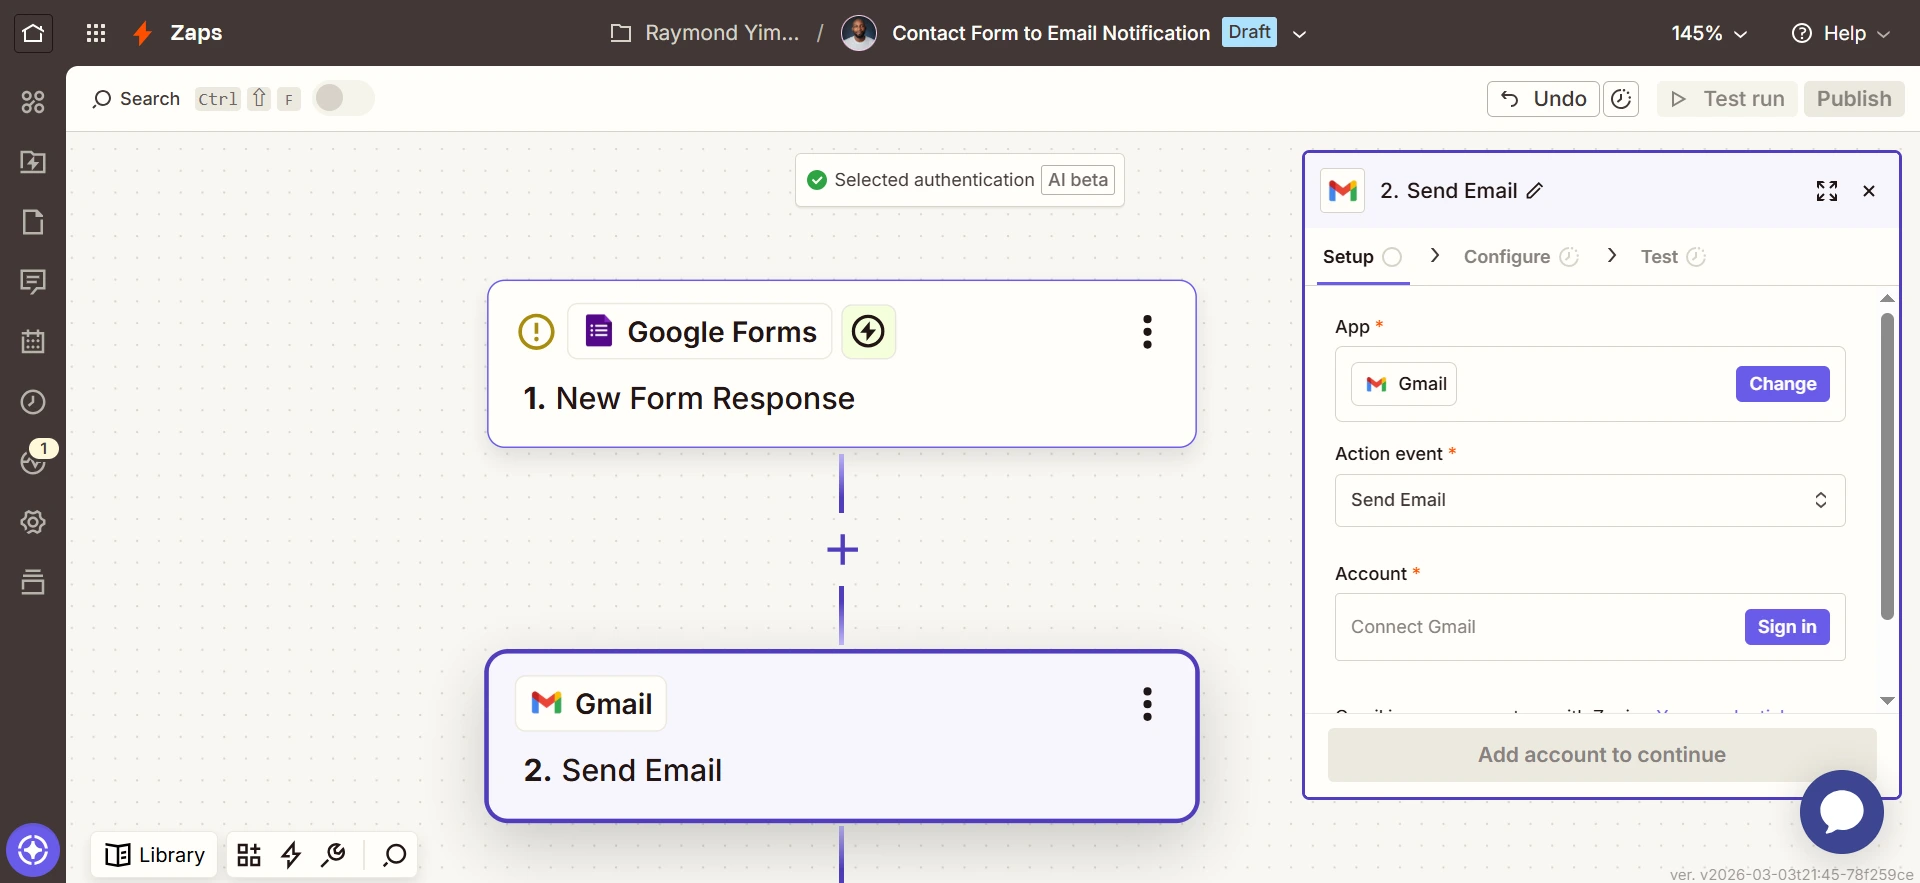
Automation 1: Contact Form → Email Notification
The problem it solves: Someone fills out your website contact form. The submission sits in your form platform, Typeform, Google Forms, Jotform. Until you remember to check it manually. By then, hours or days have passed and the lead has gone cold.
The automation:
- Trigger: New form submission
- Action: Send an immediate email with the submission details
How to set it up:
- In Zapier, click “Create Zap”
- Search for your form tool (Google Forms, Typeform, Jotform, etc.)
- Select “New Response” or “New Submission” as the trigger
- Click “Continue” and sign into your form account
- Select which specific form should trigger this Zap
- Click “Test trigger” to confirm Zapier can read your submissions
- Click “Continue”
- For the action, search “Gmail” or “Email by Zapier”
- Select “Send Email”
- Enter your email address in the “To” field
- Write a subject line such as: “New Contact Form Submission”
- In the body, click inside the field to reveal your form’s data fields, insert Name, Email, Message, or whichever fields your form collects
- Click “Test action” and check your inbox
- Turn the Zap on
Time to set up: 10 minutes Time saved monthly: 2–4 hours of manual form-checking, plus faster lead response times
Automation 2: Email Attachments → Cloud Storage
The problem it solves: Clients send contracts, invoices, photos, and documents by email. You download the attachment, open your cloud storage, navigate to the right folder, and upload it, then repeat that 20 times a week. It’s tedious, and it only takes one missed file to cause a headache.
The automation:
- Trigger: Receive an email with an attachment (from a specific sender or with a specific label)
- Action: Automatically save the attachment to a designated Google Drive or Dropbox folder
How to set it up:
- Create a new Zap
- Select “Gmail” as the trigger app
- Choose “New Attachment” as the trigger event
- Sign into Gmail
- (Optional) Add a filter to only capture emails from specific senders or with a specific label
- Test the trigger
- For the action, select “Google Drive” or “Dropbox”
- Choose “Upload File”
- Sign into your cloud storage account
- Select the destination folder
- Map the “File” field to the attachment from your Gmail trigger
- Map the “File Name” field to the attachment’s filename
- Test the action to confirm the file uploads correctly
- Turn the Zap on
Time to set up: 12 minutes Time saved monthly: 3–5 hours of manual downloading and uploading
Automation 3: Calendar Event → Team Notification
The problem it solves: You schedule meetings, appointments, and deadlines in Google Calendar. Your team needs to know about them but doesn’t consistently check the shared calendar, so you end up sending manual Slack messages or reminder emails: “Hey, client call at 2 PM today.” Every time.
The automation:
- Trigger: New event added to Google Calendar (or an event starting soon)
- Action: Send a notification to a Slack channel or team email
How to set it up:
- Create a new Zap
- Select “Google Calendar” as the trigger app
- Choose “New Event” or “Event Start” (use “Event Start” if you want reminders before events begin)
- Sign into Google Calendar
- Select which calendar to watch
- Test the trigger
- For the action, select “Slack” or “Email by Zapier”
- If Slack: Choose “Send Channel Message,” select the appropriate channel, and compose a message using event details pulled from your calendar (event name, start time, description)
- If Email: Enter your team’s email addresses along with a subject line and message body populated with event details
- Test to confirm the notification appears correctly
- Turn the Zap on
Bonus tip: When using the “Event Start” trigger, you can set notifications to fire 15 minutes before, 1 hour before, or any interval that works for your team.

Time to set up: 10 minutes Time saved monthly: 2–3 hours of manual reminder-sending, plus fewer missed meetings
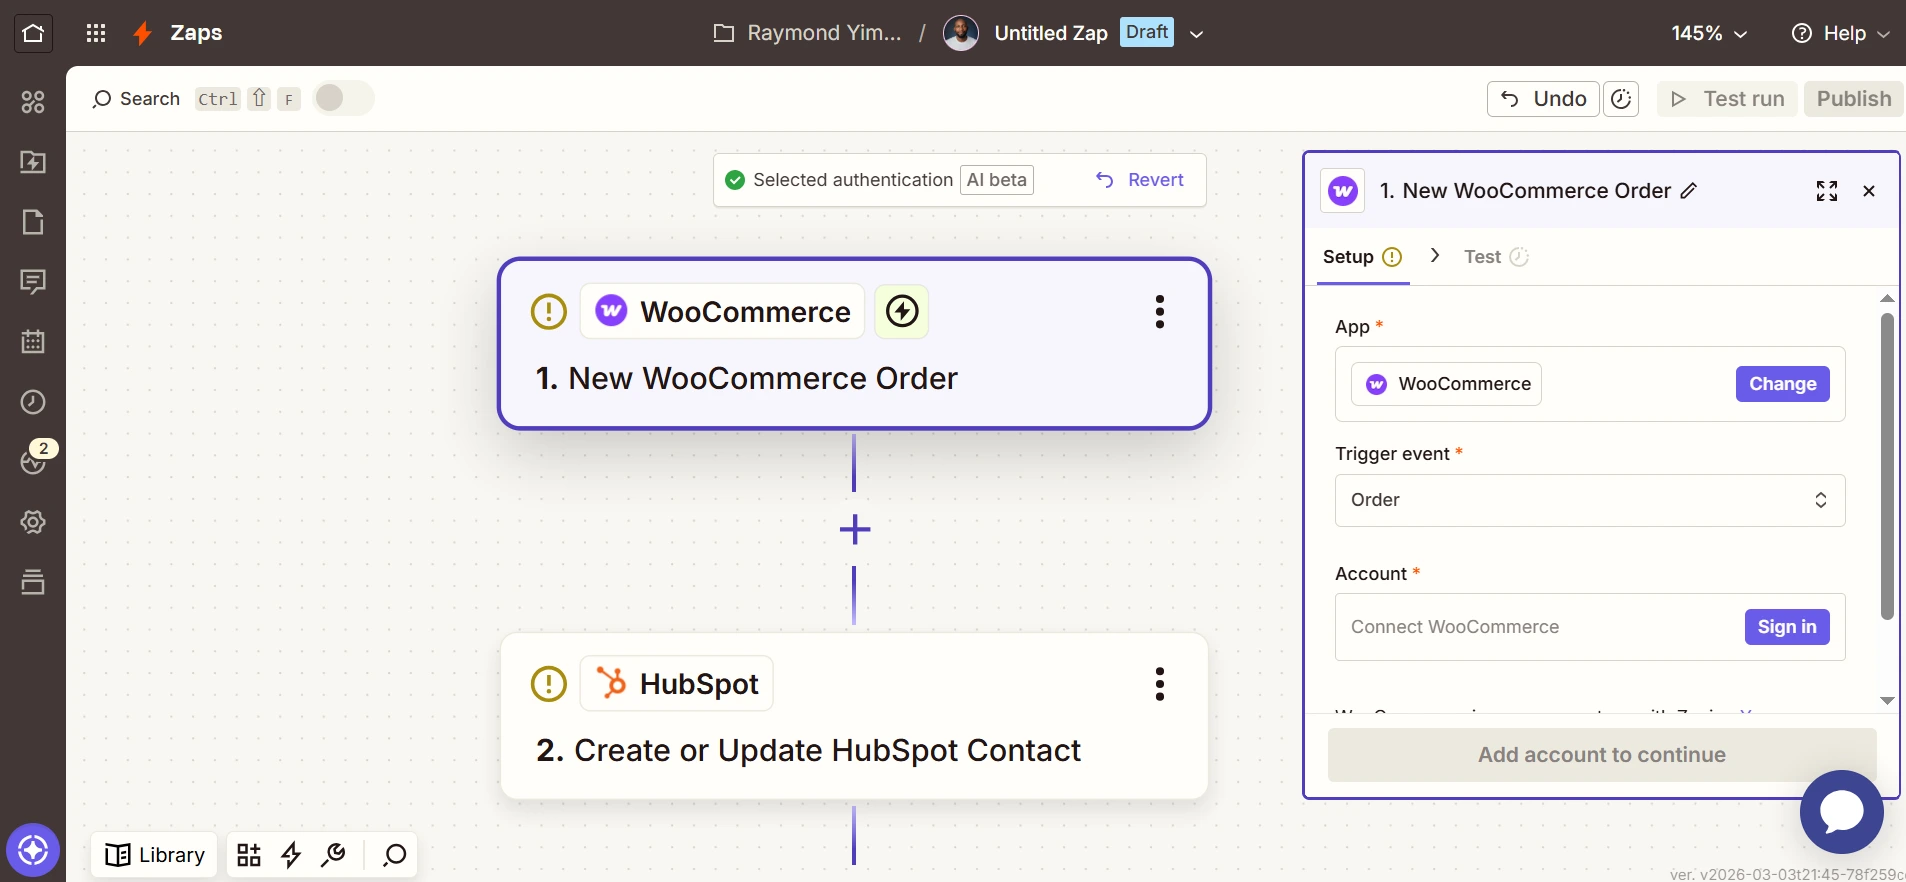
Automation 4: New Customer → CRM Contact
The problem it solves: Someone purchases from your online store, books a service, or signs up for your product. Their information sits in your e-commerce platform, booking system, or payment processor until someone on your team manually copies it into your CRM. That delay introduces data entry errors and slows your follow-up, both of which cost you money.
The automation:
- Trigger: New customer, new order, or new booking
- Action: Create a contact in your CRM with all relevant details populated automatically
How to set it up:
- Create a new Zap
- Select your source app (Shopify, WooCommerce, Stripe, Calendly, etc.) as the trigger
- Choose “New Customer” or “New Order” as the trigger event
- Sign in and test the trigger
- For the action, select your CRM (HubSpot, Salesforce, Pipedrive, etc.)
- Choose “Create Contact” or “Create Deal”
- Map the fields: Customer name → Contact name, Email → Email, Phone → Phone, and so on
- Add any custom fields your CRM uses (source, deal value, notes)
- Test to verify the contact appears correctly in your CRM
- Turn the Zap on
Advanced option: Add a second action to send a welcome email automatically, or assign the new contact to a specific sales team member based on region, product, or deal size.
Time to set up: 15 minutes Time saved monthly: 5–8 hours of manual data entry, plus faster follow-up that leads to more conversions
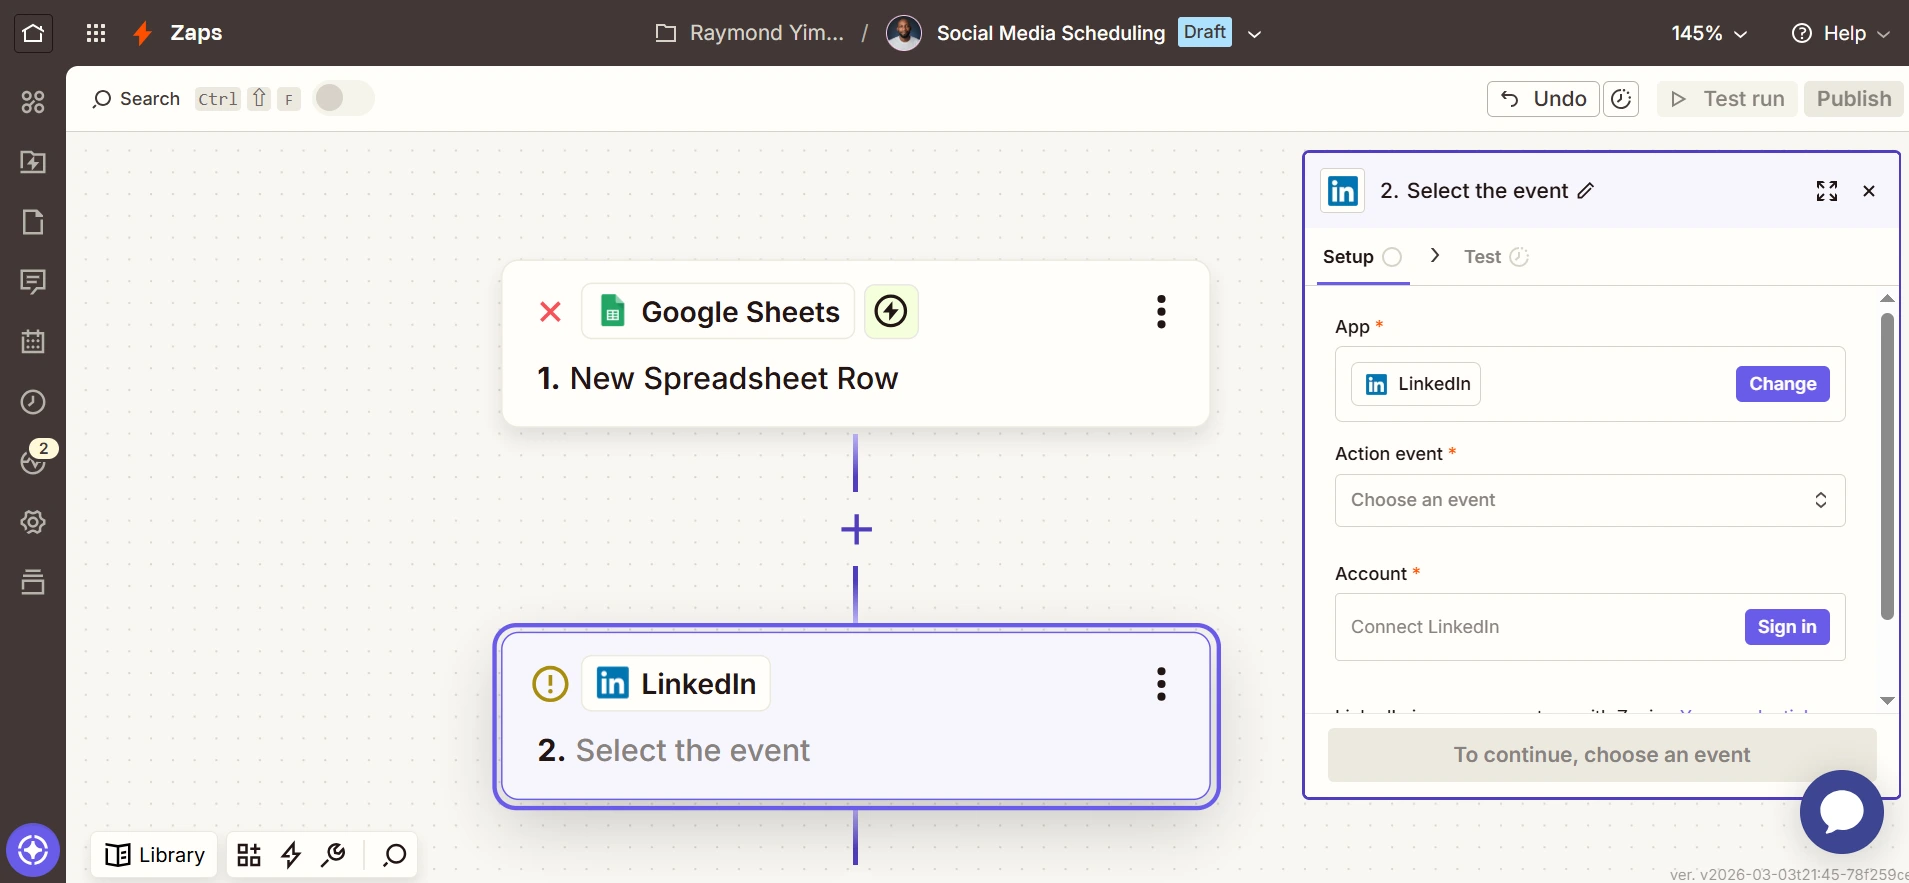
Automation 5: Google Sheets → Social Media Scheduling
The problem it solves: Consistent social media takes daily effort: logging into Facebook, LinkedIn, Twitter, and Instagram, writing posts in the moment, and hitting publish. Most business owners either burn out trying to keep up or go quiet for weeks at a time. Neither is good for growth.
The automation:
- Trigger: New row added to a Google Sheet (where you write posts in advance)
- Action: Publish to your social media platform automatically
How to set it up:
- Create a Google Sheet with these columns: Date, Time, Platform, Post Text, Image URL (if applicable)
- Create a new Zap
- Select “Google Sheets” as the trigger app
- Choose “New Spreadsheet Row”
- Sign in and select your social media content spreadsheet
- Test the trigger
- For the action, select your social platform (Facebook Pages, LinkedIn, Twitter, Buffer, etc.)
- Choose “Create Post”
- Map the “Post Text” column to the post content field
- If you’re including images, map the “Image URL” column
- Test to confirm the post publishes correctly
- Turn the Zap on
Pro workflow: Every Sunday, spend 30 minutes writing all your social posts for the week in your spreadsheet. Zapier handles the rest, publishing each post at the right time, on the right platform, automatically.
Time to set up: 12 minutes Time saved monthly: 6–10 hours of daily social media management
Common Beginner Questions
“What if I make a mistake? Will it break something?” No. Zaps don’t run until you turn them on, so you can safely test every step before going live. If something isn’t working right, you can turn off or delete any Zap at any time, no harm done.
“How much does this cost?” Zapier offers a free plan that includes 100 tasks per month and single-step Zaps. The five automations above use roughly 60–100 tasks monthly for a typical small business, so you can get started for free. When you’re ready to scale up, the Starter plan is $19.99/month for 750 tasks.
(One task = one automation action. If your contact form Zap sends you 20 email notifications in a month, that’s 20 tasks.)
“What if my app isn’t supported?” Zapier supports 6,000+ apps, including virtually every major business tool. If you use a more niche platform, alternatives may exist, but the vast majority of small business software is covered.
“Do I need to know how to code?” Not at all. Everything is click-based. If you can use Gmail and fill out an online form, you can build a Zap.
“How long until I see results?” Immediately. The moment you turn on a Zap, it starts working. When your contact form is submitted, you’ll receive the email notification within one to two minutes.
What to Automate Next
Once these five Zaps are running smoothly, here are strong candidates for your next round of automation:
- Invoice tracking: New invoice in accounting software → Add row to Google Sheets
- Customer feedback: New review received → Notify team on Slack → Log to feedback database
- Lead assignment: New lead in CRM → Check criteria → Assign to the right sales rep
- Appointment reminders: Event tomorrow → Send SMS reminder to attendee
- Content backup: New blog post published → Save to Google Docs automatically
The pattern is always the same: identify a manual, repetitive task → find the trigger and action apps → connect them in Zapier.
Avoiding Common Beginner Mistakes
Mistake 1: Starting with complex Zaps. Build simple two-step Zaps first, one trigger, one action. Get comfortable before attempting multi-step workflows with filters and conditional paths.
Mistake 2: Skipping the testing step. Always use the “Test” button at each stage. Don’t assume a Zap will work, verify it before turning it on.
Mistake 3: Forgetting to turn Zaps on. It sounds obvious, but more people than you’d think build a perfect Zap, close Zapier, and wonder why nothing is happening. Always confirm that toggle switch is in the ON position.
Mistake 4: Automating everything at once. Not everything needs a Zap. If you do something once a month, doing it manually is perfectly fine. Start with daily or weekly repetitive tasks, where time savings add up fastest.
Mistake 5: Using vague names. Name your Zaps descriptively: “Contact Form → Email Notification” is far more useful than “Zap 1.” When you have 20 Zaps running, you’ll be glad you did.
Conclusion
These five automations are a starting point, not a ceiling. For the businesses we work with, they’re always the first thing we implement, because they deliver immediate, measurable time savings with no custom development required. More importantly, they establish a mindset that scales.
Once your team stops doing things manually that software can handle, the question shifts from “Should we automate this?” to “Why aren’t we automating everything?” That’s when the real efficiency gains start compounding.
If you’ve built all five Zaps and you’re ready to go further, that’s where Maxify Global comes in. We specialize in Zapier automation for small businesses, not generic setups, but a thorough audit of your specific workflows to identify where automation will have the greatest impact, followed by building and testing everything for you.
Ready to find out how many hours your business is leaving on the table? Reach out at support@maxifyglobal.com or visit www.maxifyglobal.com to start the conversation.